SEGA SC-3000, How to remove the mother board
This is a step by step guide to opening your SC-3000 case and removing the motherboard.
Have you ever wanted to take a look inside your SC-3000? Maybe you need to repair something, or maybe you're just curious. Whatever the reason, it is fairly simple to do once you know a couple of tricks.
You will need:
- Small philips head screw driver
- Small flat blade screw driver
- Soldering Iron
- Long Nose Pliers
- Desoldering Braid or Desoldering Pump (optional)
What? I need a soldering iron to do this? Well for reasons best known to Sega they chose to solder the power switch through the case and onto the motherboard. So if you need to get the motherboard all the way out of the case then yes, you will need a soldering iron. But you can still pop the case and have a look around without desoldering anything.
Steps:
1. Turn the SC-3000 upside down and remove 3 philips head screws on the underside of case. These attach the keyboard to the base of the case.
2. Turn the SC-3000 the right way up again. The keyboard will now be loose so hold onto it as you turn it over.
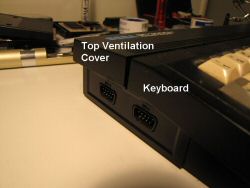
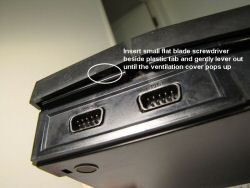
3. We need to remove the top ventilation cover. On the Joystick side of the case, insert a small flat blade screw driver under the plastic just beside the tab that keeps the ventilation cover in place and gently lever it out until the ventilation cover pops free. Go over to the cartridge side of the case and try to lift the cover. It should move up just a tiny bit.
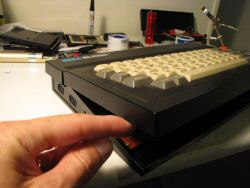 4. Once the ventilation cover is loose, you need to lift the front of the keyboard slightly. Note that the ventilation cover is still mostly in place - just loose.
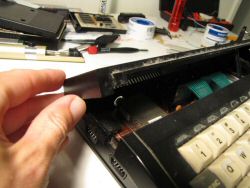 5. As you lift the front of keyboard, pull towards you gently and you will be able to remove the keyboard. You can see how it slots under the ventilation cover.
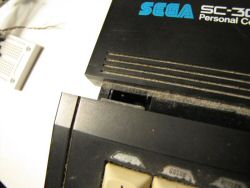 6. Once the keyboard is free from the ventilation cover, gently lift the ventilation cover up from thefront until it pops clear of its plastic hinges.
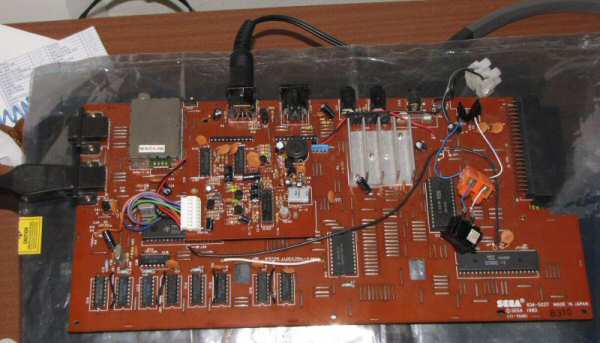
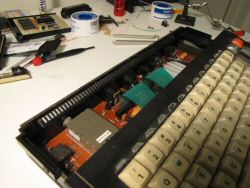 You can now have a good look at everything on the SC-3000 motherboard.
Important: Remember to ground yourself by touching a metal window frame, or a known grounded metal surface and try not to poke your fingers all over the components. They are over 25 years old and moderately static sensitive :)
Be careful, because the keyboard is attached to the motherboard in 3 different places. There are two ribbon connectors for the keyboard signals, plus a wire for the power led. If you need to do any serious computer maintenance, then you *may* need to remove the keyboard.
Just leave it attached for now and be careful with those wires :)
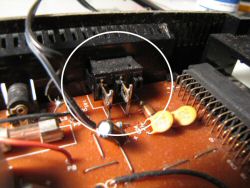
For reasons best known to themselves, Sega decided to solder the power switch through the case and onto the motherboard. That means you can't remove the motherboard without desoldering the switch.
This is actually pretty simple. Sega used a couple of big chunky connections, so all you need to do is to heat up the solder with your soldering iron, push the switch connector to the left, and gently pull the pin on the motherboard to the right with your long nose pliers until they pop apart. If you have desoldering braid or a solder sucker, then use that to mop up some of the excess solder first.
Once the switch is no longer attached to the motherboard, then squeeze the plastic retaining clips on the side of the switch and push it out through the back of the case.
8. Remove 3-4 philips head screws attaching motherboard to bottom of case.
9. There is one clip tab at the back left of the case holding the motherboard in place. Gently lift and pull the front of the motherboard towards you until it pops free of that. You may also need to wiggle the motherboard left and right a tiny bit. If it doesn't move freely, then check carefully that you have removed all the screws.
10. Done. Your SC-3000 motherboard is now out of your case and you are free to fix it.
Just take some basic anti-static precautions like making sure you have grounded yourself, and put the motherboard down on a non-conductive surface like a wooden table whilst you are working on it.
I have a spare SC-3000 motherboard which I use as a test rig for various projects. You can see how I've used an anti-static bag from an old PC motherboard to place it on when I power it up. That bag is handy for storage too :)
 Home
Home